5 Tips for Creating Landscape Photographs that are Spectacular
October 20, 2018
Every landscape photographer is familiar with the very intensive process that goes into creating landscape photographs that highlight spectacular views of nature but sometimes, beginners need a walkthrough. If you’re just getting started with landscape photography, remember that it’s much more than simply heading out with your camera and pushing the shutter button. Here are 5 tips for creating landscape photographs that look spectacular.
Choosing Your Location
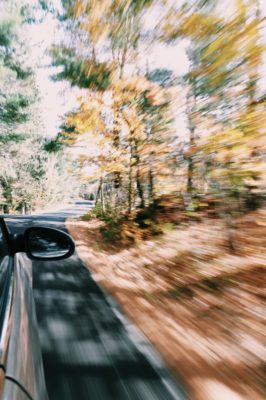
Here is a heads up, the landscape photography process begins way ahead of you reaching your chosen location, it starts with selecting the right site, at the right time of day/year and then the actual scene (as in perspective). If it’s your first time heading out into nature with a camera and some necessities, it’ll pay off to go to places that you’ve already been to and are familiar with. This is because you potentially will save time in getting there (you know where you are going); therefore maximizing the amount of time you can spend taking pictures. If you’re dead set on going to a new place, then get some help from online forums or social media for some ideas based on your location. Once you select a place, look for proper directions that you can remember on the day of the trip.
Pack Your Gear
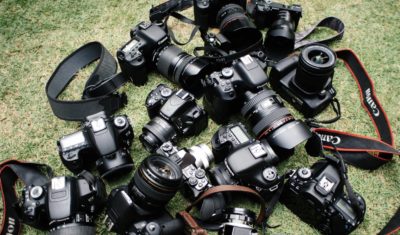
Camera
Perhaps this is too obvious, but to start you will need a camera. For the absolute beginner, you probably already have a camera, your smartphone. Most smartphones produce excellent quality images for showing on your phone or tablet or screen but will have limitations for printing in a large format. There are certain scenes though where a smartphone will be insufficient, especially in low light or more complex scenes (such as astrophotography). I have been a big fan of Canon cameras and my current favorite is the Canon 5D Mark IV. It is a 30 megapixel, full-frame camera. I mainly shoot with a 16-35mm lens but also use telephoto and wide-angle lenses when appropriate. If you have a Digital SLR (DSLR) or a mirrorless camera that lets you interchange the lenses that are a great start. Obviously, there is a wide range of cameras that are available, and they continually evolve with new models coming out from the major brands regularly. I’d suggest you research online or visit your local camera store for some advice based on your needs and budget, and make sure to mention to the salesperson that you are interested in creating landscape photographs to ensure they give you specific advice.
Make sure you know how to use your camera! Or at least take the manual with you!
Tripods
Nature is unpredictable which is why you need to come prepared to the best of your abilities. Most importantly, you’ll need a way to keep your camera steady to keep it from shaking. You will want to ensure you have a sturdy tripod to prevent the elements such as wind causing camera shake. Landscape scenes require that you often make adjustments to exposure levels
 and shutter speeds and you want to get the best quality possible, so you will want to use the slowest shutter speed possible. In the event that you need to use extended speeds and longer exposure, a tripod is necessary because these settings require that the camera remain still for longer than the average capture time if you are shooting handheld. If you don’t own a tripod, it is not to say you can’t get some excellent photos, but for the versatility of scenes, it is essential (especially at sunrise or sunset). You also want to use a tripod if you are shooting something like a waterfall to create those silky motion effects of the water.
Filters
Landscape photography isn’t all about simply taking pictures, but experimenting with the scene to make it a one-in-a-million view of a single vista. Hence, filters are an important part of your gear when taking landscape photographs. There are numerous filters to pick from, but they aren’t cheap so you should get the ones that make the most contribution to stunning fine art photography and are going to last you for many years to come. I currently use filters from Nisi Filters and depending on the scene will use a combination of Neutral Density or Polarizing filters. There are a variety of apps which also assist you in determining the best filters for your particular scene.
Other accessories
You should make sure you have enough memory cards, based on how long you will be shooting for. If I am going away for a few days I will typically take several spare memory cards to ensure I won’t run out of memory space to keep shooting. I also use a remote shutter, that allows me to plug into my camera and trigger the shutter without touching the camera (reducing possible camera shake). Make sure you get a remote that will also allow you to shoot for long exposures, especially if you are using filters so you can add that extra element of drama. Or perhaps you want to do a long exposure to capture car light trails or shoot the stars.
The Lighting (Time of Day)
It’s likely that you’ll need to wait long periods of time until the lighting is just right for fine art photography. When taking pictures of magnificent landscapes, you’re left to work with natural lighting that you can’t change. Hence, relying on tested and tried advice that calls for taking pictures during golden hours of the day when lighting is at its peak. This is the period of time around sunrise and sunset and gives great perspectives because of soft lighting. On the other hand, avoid taking pictures during midday when the sun is directly overhead unless you are using appropriate filters to reduce the harsh light.
It is easier these days to plan for your shoot using smartphone apps. A great one to look at is called PhotoPills. It allows you to plan your location’s sunrise/sunset times, along with other elements such as the direction of the sun, possible weather conditions, moon cycles and if the milky-way will be present.
Setting Your Camera
Base ISO of 200 or lower
When creating landscape photographs, you may have to keep your camera’s ISO on its base setting to get good quality pictures. The reason why you should opt for a low ISO of about 200 or lower is that the opposite, a higher ISO, results in your image potentially producing a lot of noise (ie: graininess in the image). You’ll find it to be vivid in the shadows of your picture and when you increase the size, it’ll become overpowering; ruining the quality of your photography wall art. Using your camera’s base ISO is integrated with using a tripod; no tripod means you’ll have to take pictures at higher ISO to avoid camera shake, resulting in noise. If I am shooting with a tripod I will try to shoot around 100 ISO but some cameras may not go this low. If I am shooting a star photograph then I will need to shoot at a much higher ISO in order to capture the scene and limited light available.
f/8 to f/11 Aperture
In conjunction with the ISO, Aperture is also very important. For a typical scene of a landscape – such as a country scene, you want the majority of the image to be in focus. An aperture between f/8 and f/11 will generally be the sweet spot for your image. It may be a matter of experimenting with your particular camera and lens combination and the scene. As you move towards f/2.8 or f/4, you will find that fewer areas of the image are in focus. Also, as you move the other way past f/11 towards f/22, the image will become softer.
Post-Production
After you have been busy creating landscape photographs and return home, you will download the images and start to sort through them. Software these days is just an important part of the overall process as is the camera, location, and scene. Software such as Adobe Lightroom or Adobe Photoshop are the main options, however, other simpler programs are available and often are included with a computer purchase, such as Apple’s Photos App.
It is a good idea to think of post-production as the process that used to happen in the darkroom when photographers used film. On the computer, you are able to edit aspects of the image such as brightness, contrast, tone and colour. This is part of the artistic process as it is where you can also continue to fine-tune the image to your personal taste and prepare the image for printing. My personal workflow is to adjust some elements of the photograph in Lightroom such as brightness and white balance and then do the final touchups in Photoshop, such as removing a dust mark or other artifacts.
I hope this helps, and happy shooting as you go out creating landscape photographs!